> ## Documentation Index
> Fetch the complete documentation index at: https://hyperframes-feat-thread-message-stack.mintlify.site/llms.txt
> Use this file to discover all available pages before exploring further.
# Color grade images and footage
> Correct exposure and color, shape a look, apply a LUT, and review the result in Studio.
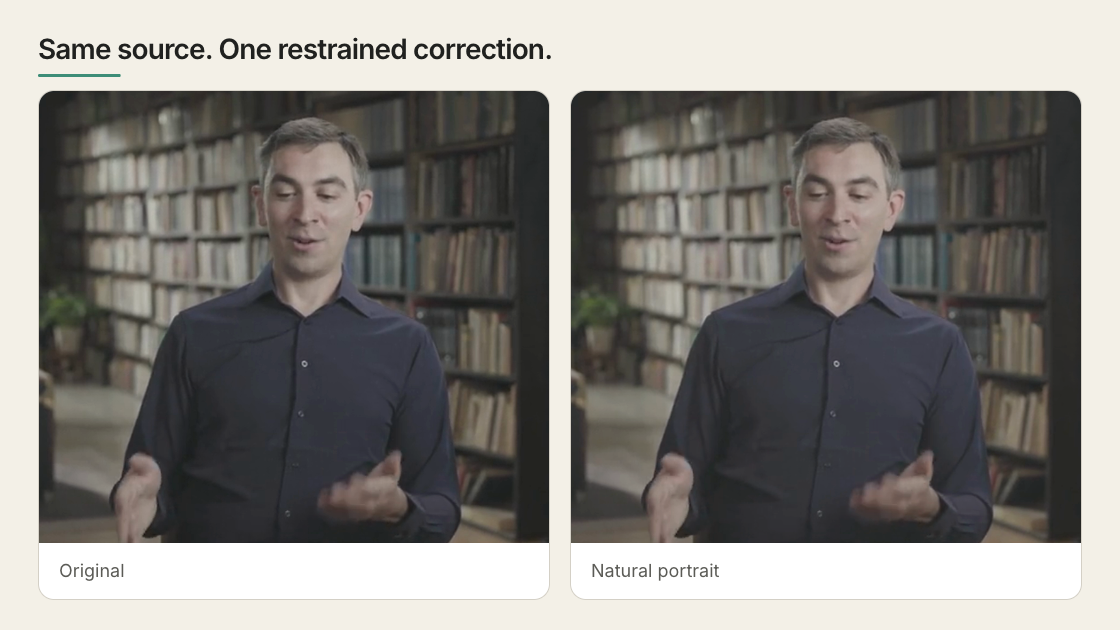
Use Color Grading when an image or video needs correction or a deliberate
visual look. It changes that media element only; text, captions, SVG, and normal
HTML remain separate layers.
 ## Work in this order
| Pass | Purpose |
| ------------ | ----------------------------------------------------- |
| Correct | Fix exposure, white balance, contrast, and saturation |
| Grade | Shape tonal ranges or a selected color |
| Apply a look | Start from a preset or a compatible `.cube` LUT |
| Finish | Add restrained detail or film effects |
Correct before stylizing. A strong preset cannot rescue clipped highlights,
unreadable shadows, or the wrong source.
## Grade in Studio
1. Select an image or video on the canvas, in Layers, or on the timeline.
2. Open **Color grading** in **Design**.
3. Start with a preset or small corrections.
4. Use the scopes and compare control to check the result.
5. Scrub several moments before judging moving footage.
The controls answer different questions:
| Control | Use it for |
| ----------------------------------------------------------------- | ------------------------------------------------------- |
| Preset and strength | Establish a starting look |
| Exposure, contrast, highlights, shadows, white point, black point | Correct brightness and contrast |
| Warmth, tint, vibrance, saturation | Correct or shape color |
| Color wheels | Shift shadows, midtones, or highlights |
| RGB curves | Remap luminance or individual channels |
| Hue curves | Move, saturate, or brighten a selected hue |
| HSL selections | Correct pixels inside a hue, saturation, and luma range |
| Grain, vignette, blur, and effects | Finish or deliberately degrade the image |
| Custom LUT | Apply a known 3D `.cube` transform |
HyperFrames supports up to four ordered HSL selections. They are static
pixel-value qualifiers, not object tracking, rotoscoping, or spatial masks.
Studio scopes are inspection tools:
| Scope | Shows |
| ----------- | --------------------------------------- |
| Histogram | Overall dark-to-bright distribution |
| Waveform | Brightness by horizontal image position |
| RGB Parade | Channel balance and clipping |
| Vectorscope | Hue direction and saturation |
## Give the agent the visible problem
You do not need to prescribe shader values:
```text theme={null}
The interview looks too dark and slightly cold.
Keep skin natural, recover the background enough to read, and avoid a filtered look.
```
The agent can inspect the current capability contract and analyze a local
source before changing it:
```bash theme={null}
npx hyperframes media-treatment --capabilities --json
npx hyperframes media-treatment --selector '#interview' --analyze --json
```
For source-sensitive prompts and worked A/B examples, continue to
[Color grading and film effects](/prompting/color-grading).
## Reuse a grade carefully
In Studio, use **Copy grade to** for other media in the current file or project.
Treat the copy as a starting point and inspect each source.
Project-wide copy rejects project-relative LUT paths because the same path can
resolve differently from another composition. Use a project-root path, a data
URL, or copy only within the current file.
## Use LUTs with known intent
Import a project-local 3D `.cube` LUT only when you know the look or conversion
it expects. HyperFrames does not identify camera profiles or apply an automatic
ACES/OCIO workflow.
A creative Rec.709 LUT is the safest normal path. LOG or HDR footage requires a
known source transform.
## Current limits
| Source or workflow | Status |
| -------------------------------------------- | ---------------------------------------------------------------------- |
| SDR image or video | Supported |
| 4K SDR media | Supported with higher preview and render cost |
| iPhone HDR, HLG, or Dolby Vision-style media | Studio can show an SDR preview; native HDR delivery is a separate path |
| LOG footage | Requires a known matching transform or LUT |
| Full-scene grade including HTML text | Not supported; grading targets individual media elements |
| Face or region tracking | Not supported |
| Remote media | Requires compatible CORS headers |
| ACES/OCIO finishing | Outside the current browser shader pipeline |
Continue to [Media effects](/guides/media-effects) for blur, bloom, retro,
print, glitch, and art treatments. Use [HDR rendering](/guides/hdr) when the
final delivery must remain HDR.
Persist a grade, animate supported properties, or isolate a graded region.
## Related topics
* [Apply media effects](/guides/media-effects)
* [Use images and video](/guides/video-components)
* [Deliver an HDR render](/guides/hdr)
## Work in this order
| Pass | Purpose |
| ------------ | ----------------------------------------------------- |
| Correct | Fix exposure, white balance, contrast, and saturation |
| Grade | Shape tonal ranges or a selected color |
| Apply a look | Start from a preset or a compatible `.cube` LUT |
| Finish | Add restrained detail or film effects |
Correct before stylizing. A strong preset cannot rescue clipped highlights,
unreadable shadows, or the wrong source.
## Grade in Studio
1. Select an image or video on the canvas, in Layers, or on the timeline.
2. Open **Color grading** in **Design**.
3. Start with a preset or small corrections.
4. Use the scopes and compare control to check the result.
5. Scrub several moments before judging moving footage.
The controls answer different questions:
| Control | Use it for |
| ----------------------------------------------------------------- | ------------------------------------------------------- |
| Preset and strength | Establish a starting look |
| Exposure, contrast, highlights, shadows, white point, black point | Correct brightness and contrast |
| Warmth, tint, vibrance, saturation | Correct or shape color |
| Color wheels | Shift shadows, midtones, or highlights |
| RGB curves | Remap luminance or individual channels |
| Hue curves | Move, saturate, or brighten a selected hue |
| HSL selections | Correct pixels inside a hue, saturation, and luma range |
| Grain, vignette, blur, and effects | Finish or deliberately degrade the image |
| Custom LUT | Apply a known 3D `.cube` transform |
HyperFrames supports up to four ordered HSL selections. They are static
pixel-value qualifiers, not object tracking, rotoscoping, or spatial masks.
Studio scopes are inspection tools:
| Scope | Shows |
| ----------- | --------------------------------------- |
| Histogram | Overall dark-to-bright distribution |
| Waveform | Brightness by horizontal image position |
| RGB Parade | Channel balance and clipping |
| Vectorscope | Hue direction and saturation |
## Give the agent the visible problem
You do not need to prescribe shader values:
```text theme={null}
The interview looks too dark and slightly cold.
Keep skin natural, recover the background enough to read, and avoid a filtered look.
```
The agent can inspect the current capability contract and analyze a local
source before changing it:
```bash theme={null}
npx hyperframes media-treatment --capabilities --json
npx hyperframes media-treatment --selector '#interview' --analyze --json
```
For source-sensitive prompts and worked A/B examples, continue to
[Color grading and film effects](/prompting/color-grading).
## Reuse a grade carefully
In Studio, use **Copy grade to** for other media in the current file or project.
Treat the copy as a starting point and inspect each source.
Project-wide copy rejects project-relative LUT paths because the same path can
resolve differently from another composition. Use a project-root path, a data
URL, or copy only within the current file.
## Use LUTs with known intent
Import a project-local 3D `.cube` LUT only when you know the look or conversion
it expects. HyperFrames does not identify camera profiles or apply an automatic
ACES/OCIO workflow.
A creative Rec.709 LUT is the safest normal path. LOG or HDR footage requires a
known source transform.
## Current limits
| Source or workflow | Status |
| -------------------------------------------- | ---------------------------------------------------------------------- |
| SDR image or video | Supported |
| 4K SDR media | Supported with higher preview and render cost |
| iPhone HDR, HLG, or Dolby Vision-style media | Studio can show an SDR preview; native HDR delivery is a separate path |
| LOG footage | Requires a known matching transform or LUT |
| Full-scene grade including HTML text | Not supported; grading targets individual media elements |
| Face or region tracking | Not supported |
| Remote media | Requires compatible CORS headers |
| ACES/OCIO finishing | Outside the current browser shader pipeline |
Continue to [Media effects](/guides/media-effects) for blur, bloom, retro,
print, glitch, and art treatments. Use [HDR rendering](/guides/hdr) when the
final delivery must remain HDR.
Persist a grade, animate supported properties, or isolate a graded region.
## Related topics
* [Apply media effects](/guides/media-effects)
* [Use images and video](/guides/video-components)
* [Deliver an HDR render](/guides/hdr)